Introduction
The NRG Awareness Heat Loss Calculator is designed to help installers, designers and homeowners calculate the heat loss of a building. The calculations are based on the methodology laid out in the CIBSE Domestic Heating Design Guide from 2020, this is the same guide that SEAI used for their “Heat loss calculation and radiator sizing for heat pump systems” spreadsheet.
The application breaks down the normally complicated calculation process into simple logical input fields, each with a description.
This means that the user doesn’t need in-depth knowledge of heat loss calculations and thermal modelling in order to get accurate results. The end report gives the heat loss of each room, recommended radiator size, radiator correction factor, recommended underfloor heating pipe centres and the total heat loss for the building which can be used to size the boiler or heat pump. The report also gives the flow rate of each zone and the flow rate required by the boiler/ heat pump, this information can be used for sizing the system’s circulating pumps. Please see the example report at the bottom of this post.
Step 1 – Project information
When first opening the application by going to app.nrgawareness.com you are faced with the first step, Project information. At the top of this page, there is some general information about the calculator and below this text, the first input fields are shown. In this step you need to input som information about the project like name, design temperatures, number of rooms, type of heat source, and number and type of heating zones.
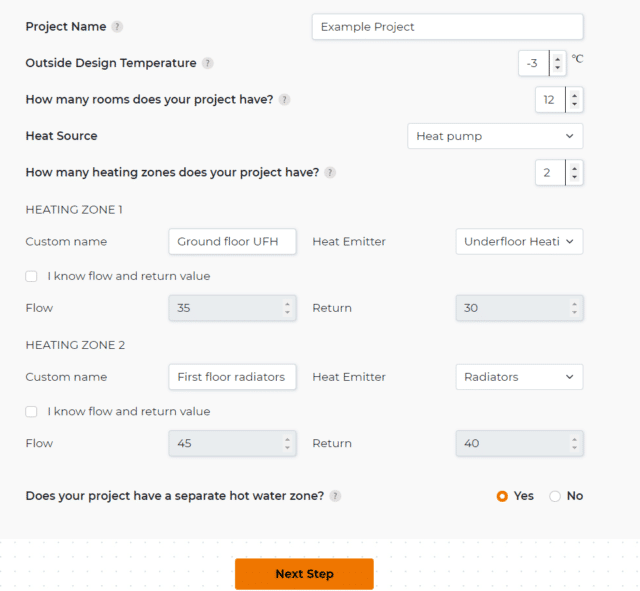
Remember that the calculator is dynamic so it will adapt to your input. The number of rooms selected on this page will determine the number of rooms you have to fill out in the next step. You can also see that I selected 2 heating zones, which made 2 sections appear below that I needed to fill out, one for each zone. The flow and return temperatures for the heating zone is automatically filled out based on the type of heat source and the type of heat emitter. The default values are the ones recommended by NRG Awareness, but you can override them if desired by clicking “I know flow and return value”.
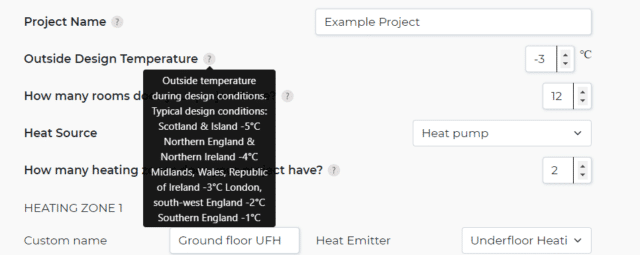
Remember, whenever you are unsure about an input, just hover over the “?” symbol and you will get a more in-depth explanation.
Step 2 – Room Data
After clicking the “Next Step” button you are brought to step 2. Here you have to input the data for each room.
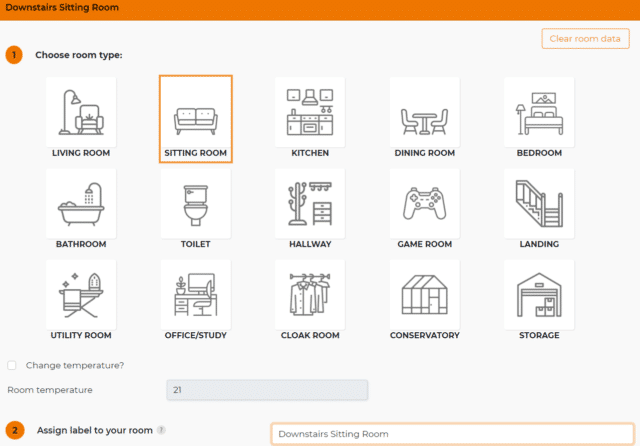
Section 1: Choose room type
You need to choose the type of room that you’re inputting the data for. This information will determine the recommended room temperature and ventilation rate.
Section 2: Assing label to your room
Assign a label to your room, this is just to make it easier for you to identify the room on the final report.
Section 3: Building age
This input will determine the quality of the insulation (U-values) and draught-proofing (ventilation rate) of the room. If you have done work to the room or if you know your actual U-values or ventilation rates, you can override the default values by clicking “I know my U-values” or “I know my ventilation rate”.

Section 4: Heating information
Here you have to tell the calculator which of your heating zones the current room is a part of. If you select a heating zone with underfloor heating, the U-value of the floor will automatically be changed to 0.15 because we assume that rooms with underfloor heating installed have well-insulated floors. If this is not the case with your floor, you can override the floor U-value. In section 4 you also have to select if the rooms above or below are heated spaces. This will determine if the heat losses through the roof and/or floor needs to be calculated.

Section 5: Room Dimensions
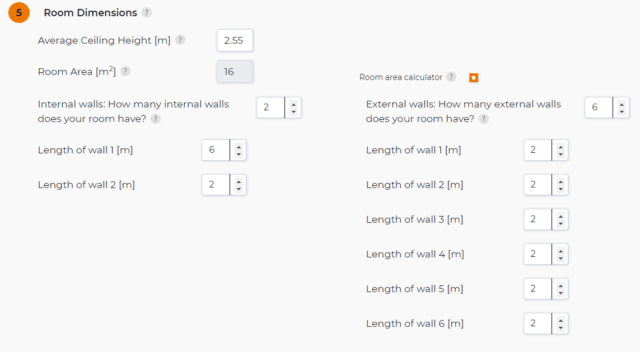
In this section, you need to input the dimensions of the room. The required inputs are the room height, room area, length of inside walls and length of outside walls. If your ceiling height is not the same in the whole room you have to input the average ceiling height of the room. If you need help calculating the area of your room you can click the box next to “Room are calculator” to bring up a calculator to assist you. The room area calculator is suited for most room shapes, just make sure that you input the correct dimension for the correct wall. See figure below.
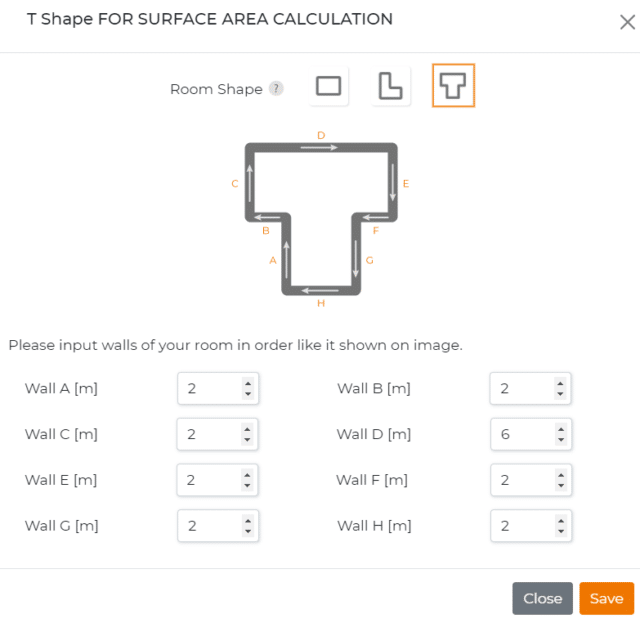
In this example, walls D and E are internal walls, while the rest are external walls. The final result can be seen below. To save me some inputs I could have inputted 1 internal wall of 8m and 1 external wall of 12m. It is the total length of walls that matter for these inputs.
Section 6: Doors and Windows
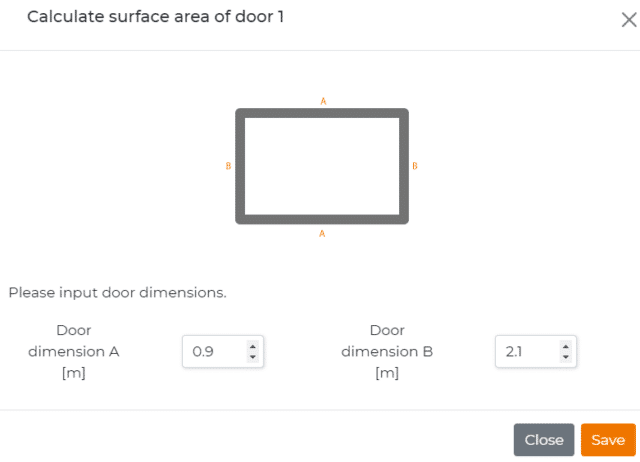
In this section, you have to input the number and size of all external windows, doors and roof lights. Again, there is a calculator to help you calculate the size of them if needed, these calculators are only for rectangles since most doors and windows are rectangular.

Section 7: Ventilation information
The last step is the ventilation information. Here you have to input how many open chimneys, open flues and extraction fans are in the room. Together with the ventilation rate, this information is used to calculate the ventilation losses of the room. Once complete click next room.

Step 3: Completion
Once you finish filling out all the room data click “Complete” at the bottom of the page.

This will bring you to the final page where you input your contact information and request a report.

Step 4: Final Report and how to use it
Once you’ve finished everything you will get a heat loss report generated by the application, an input report that shows all your inputs for verification purposes, a document explaining how to use the information in the heat loss report and a brochure with information on products and services we provide.
An example of a heat loss report and the document on how to use it can be seen in the PDFs linked below:
